Sunday, July 20, 2014

Take Me Back in Time

Hello everyone,

A couple of years ago I took a card class. In the class we made two masculine cards, something I had not done before and it has inspired me to make more. I gave one of the cards that I made in the class to my father and the other to my husband. My husband still has his card and my father framed his and hung it in the garage beside his adored Mustang.

I recently made another card for my dad, a vintage car card. He said that he is going to frame this one as well and hang it beside the other one.


I have to say, I think the Art Deco Cricut cartridge has to be my favorite cartridge so far. I say this but I haven't cracked open my Outdoor Man cartridge yet. It may be a tough choice and they may both become my favorite.

Lets start at the back of the card. I saw this technique online a while back (I can't remember the source, sorry), where you ink the flat side of the embossing folder and then emboss the paper. What a fantastic technique. It allowed me to add colour to the flat portion of the paper and not the embossed portion of it. I did a test where I did not ink the embossing folder but inked the embossed pattern instead. As you can see, the test sheet did not make it to the card. I much prefer the lighter red embossed pattern and the dark brown background.

In keeping with the vintage look, I inked the edge of each framed paper. This is a technique that I use often and find that it gives the paper - patterned or solid colour - a little more pop.

I absolutely love how this card turned out and from my father's reaction you can tell that he loved it too.

Until next time, Happy Paper Crafting!!!!


Used from my inventory:
  • Recollections cardstock
  • EL-017 M-Bossabilities
  • Walnut stain distress ink
  • Big Shot
  • Scotch Advance tape glider
  • Cricut Expression
  • Art Deco Cricut cartridge
  • Stampin'up 2-way glue pen
  • Paper and cardstock from my leftover pile


Friday, July 4, 2014

Love is Blind

Hello everyone,

I had so much fun with this card.


The card was inspired by a quote I found online "Love is Blind, why is lingerie so popular?". So true. Unfortunately the author of the quote is unknown.

I used the Cricut Expression and the Tie the Knot cartridge to create the bustier and bling'd it up with some xmas red stickles.

I find that the Spellbinder large classic scallop cutout creates a feeling of a window, like looking into someone's boudoir.

I wanted the entire card to have a lacy feel to it. I stamped swirl designs on the red cardstock and applied the black trim to the inside edge of the card. The black trim is leftover iron-on applique that I used in the design of my sister's wedding dress. Surprisingly enough the applique bonded to the card when I heated it with my Marvy embossing heat tool. I don't think I would use the heat technique if I were to use the applique on something that would be handled often. The bond is not as strong as using glue.


I am submitting the card in the Fantabulous Cricut Challenge #217 "Anything Goes".

Hope you enjoyed. Until next time, happy paper crafting!


Supplies used from my inventory:
  • Recollection 110lb cardstock
  • Cardstock from my leftover pile
  • Spellbinder Classic scalloped oval large
  • Xmas red Stickles
  • Cricut Expression
  • Tie the Knot cartridge
  • Big Shot
  • Jet black Archival Ink
  • Iron on trim - source unknown
  • HP Deskjet F4280
  • Stampin'up 2-way glue pen
  • Tombow glue
  • Marvy embossing heat tool
  • Autumn Leaves - Swirls V:I stamps


Thursday, June 26, 2014

Inventory Book

Hello and happy sunshine everyone,


I was inspired... hmmm... not strong enough of a word to describe my excitement to do this project, I was energized by Ranger Ink's "Organize Your Ranger Products" section of their website. In this section they provide beautifuly presented colour swatch charts that you fill in with the products that you have. I felt like I was playing bingo when I filled in the swatch chart for my distress inks.


They also provide coloured label sheets. You print the labels, punch them out with a circle punch and place the label on the cap of the Adirondack Dabber, the cap of the Distress Stains, etc. It all depends on which labels you have printed and what products you own.

If you haven't seen "Organize Your Ranger Products", it's a must see.

The Upcycling book by Danny Seo inspired the front and back cover of the inventory book. I used the leftover flooring from our new basement bathroom to create the cover. The flooring was not sturdy enough on it's own, especially if I wanted to stand the book up in my library. I gave the flooring some strength by glueing it to a photo mat board.


Inside the book I have various sections. The sections are divided as follows:Ranger products; Copic markers; Other inks; Stamps; Cricuit cartridges; Dies; and Embossing folders and plates;


I have incorporated the Copic image for my personal use.
I have not, nor will I sell this inventory binder. 


The book may seem like a lot of work to create and a lot of work to complete but I created the book to keep me organized on a couple of different levels.

I like having my friends come over and play in my studio. I enjoy sharing the tools and products I have. However, I came to realize that as they used my stamps, removing them from their sets, I was lost by the end of the day. I couldn't remember where the stamps belonged and was not able to return them to their proper home.

On the other side of the organization coin, I like to remove my tools and products from their original package and place them within my own organizing system. The upside to this is that things are placed in a more logical, easy to use, easy to put away system. The downside is that I don't have the name of the stamp set or the name of the company included on the item's new home. As you can see, in the inventory binder, I have indicated the name of the item, the company, if it's a stamp I have also included how many are in the set, if I have the coordinating die and if they are cling or wood mount (which will tell me where to find them).


To my surprise, as I was recording the various stamps that I own, the stamped images were inspiring different projects. A stamped image provides a better visual than the stamp itself.

When starting a project, I don't have to search through my supplies for inspiration, I can flip the pages of my inventory book for that perfect ink, stencil, stamp, cartridge, etc. The great thing with the book is that it is portable (obviously). If I want to assemble my ideas on the bus as I commute to work and home, I can do that.

I created the dividers using the We R Memory envelope punch.


I created the holes for the book binding using a cardboard template and the Crop-A-Dile. I laid the spiral on some heavy cardboard cut to an 8.5 x 11 size sheet and made a pencil mark at each place the spiral touched the cardboard then I used the Crop-A-Dile to make uniform holes all along the edge. I paperclipped the template to the printed pages, about 10 pages at a time and punched all the holes. I repeated this process until the entire book was punched. To assemble the book, I threaded the spiral into the stack of papers, one hole at a time.

I am very happy with my inventory book. My only fear is that I am going to run out of pages. However, that's a minor fear because I can simply undo the book, use my template to punch more papers and then reassemble the inventory book.

Hope you enjoyed this post.
Until next time, happy paper crafting.


Tuesday, May 27, 2014

Summer Vacation (part 2 of 2)

Hello again,

Winter vacations are finished and summer vacations are about to begin.

When I think of summer vacations I think of camping with my family and friends. Camping is one of the only times that I actually sit and do nothing; maybe read a book but nothing else. It is the ultimate relaxation and sometimes a little too relaxing for a person like me who is always on the go.

This past weekend, I created a camping scene for a card using my Cricut Expression and the Everyday Paper Dolls cartridge.

Up until recently, I used to stress about having just the right paper for each image I was cutting. I don't stress about it any more. For the campfire, I cut the image three times out of white cardstock. The bottom layer remained intact and I coloured only the fire using YR07, Y35, and Y13 Copic markers. The second layer, I removed the fire portion, coloured the logs using E23, E77, and E37 Copic markers and adhered it to the fire layer. For the rocks, I removed the fire and logs on the third copy of the image, coloured the rocks using C5 and C3 Copic markers and layered it on top of the other two coloured layers.

Sectioning off the different elements of the image and layering them makes for a more realistic dimensional image. I love the effect and will repeat this technique in other Cricut inspired projects. I used the same technique for the marshmallows and the sign.

When I am ready to give this card to someone, I may stamp an appropriate message (Happy Birthday, Thinking of you, You light my fire, etc.) on the bottom right corner of the card or I may keep it simple.


I am entering the Campfire card in the Simon Says Stamp Wednesday Challenge "Vacation/Travel".

Thank you for stopping by and until next time, Happy Paper Crafting!


Supplies used from my inventory:

  • Recollections 110 lbs cardstock
  • Recollections Spice Market cardstock
  • Paper from Basic Grey
  • White pieces of cardstock from my scrap pile
  • Copic markers - YR07, Y35, Y13, E23, E77, E37, C5, C3, YG03, YG63, W5, W1
  • Stampin'up 2-way glue
  • Zapdots foam adhesives
  • Cricut Expression
  • Everyday Paper Dolls Cricut cartridge
  • Viva Décor dark brown Pearl Pen
  • Tim Holtz Idea-ology Chitchat stickers
  • Tim Holtz Gathered Twigs Distress ink
  • Ink dauber

Supplies purchased:

  • Nothing


Winter Vacation (Part 1 of 2)

Hello everyone,

Winter has always been a time for hibernation. However, this past winter my husband and I took our two year old son and joined some friends of ours on a Caribbean cruise. We enjoyed our time away and I have to say, it will be difficult to survive another winter without an escape to a warmer, sunnier location for at least a week.

I used one of the photos our friend took while on the trip to create this card.


I like the triple stamping technique, it's fast and simple. My friend from Papertician had read about a similar technique using the same stacking and matching idea as the triple stamping but instead of stamping you use a photo. What a neat idea.

I am entering the Bon Voyage card into the Simon Says Stamp Wednesday Challenge "Vacation/Travel".


Supplies from my inventory:
  • Tim Holtz, Stampers Anonymous - Artful Voyage
  • Jet Black Archival ink
  • Recollections cardstock
  • Zapdots foam adhesives
  • Tim Holtz Faded Jeans distress ink
  • Tombow glue
  • Scotch Advance tape glider

Supplies purchased:
  • Black's photo developing


Thursday, May 15, 2014

Anniversary

Well, it has been a year since my very first post and what a year it has been.

Three Cs blog is close to 2,000 views which makes me very happy and I am grateful that you take the time to come and read what I post. Thank you.

I have many projects in the works and I am hoping, in the upcoming year, to post on a more consistent basis.

My first post in my second year of blogging comes to you courtesy of my sister. She requested a gift card to one of her favorite clothing shops for her birthday. No problem, consider the gift card purchased. However, as all crafters know, you can't just give someone a gift card, it has to come in a nice package.

I have been waiting a long time for the "Forever Young" Cricut cartridge to go on sale. No luck. It was holding strong at its current price. The "Forever Young" cartridge includes a large selection of fashion related images and would be perfect for a clothing gift card holder. Hmmm, continue to wait for the cartridge to go on sale or buy it for the sake of my sister's present? Pack your bags cartridge, your coming home with me.


One of the best things about using the Cricut is that I get to use up many of the scrap pieces of paper I have been collecting from other paper projects. It's surprising how little paper the Cricut uses and the stunning projects it creates.


The gift card would be placed in the slot between the shoes.

Thanks for stopping by and until next time, happy paper crafting.


Supplies used from my inventory:
  • Various leftover cardstock
  • Cricut Expression
  • Close to my Heart - Soul Mates Sentiments
  • Tim Holtz distress ink - Aged Mahogany, Gathered Twigs
  • Kool Tak - 2 sided tape
  • Recollections - Spice Market cardstock
  • Tombow glue
  • Scotch Advance tape glider
  • Fiskar paper trimmer
  • Big Shot
  • Sizzix Tween Tile
  • Crop-A-Dile Corner Chomper
  • Crop-A-Dile II
  • Stampin'up - Sincere Salutations
  • Celebrate It - ribbon

Item purchased:
  • Forever Young Cricut cartridge


Sunday, May 4, 2014

Let's Ride

Hello everyone and happy Sunday

The challenge this week at Simon Says Stamps is "Anything Goes", so here goes anything.

I have started collecting cardboard that used to end up in the recycling bin. I guess I am upcycling items around the house. The collection began as I was about to throw out a frozen pizza box. The box was clean and the cardboard was the perfect thickness to be sturdy but yet embossable.

Pair the saved cardboard with a little tin foil and you have a fantastic metallic look to work with.

I started by cutting the cardboard to the size that I needed and then ran it through my Xyron machine. I placed the sticky side of the cardboard to the non-shiny side of a large piece of tin foil. I trimmed the tin foil, leaving enough to wrap the edges of the cardboard and taped it to the back.

I ran the metallic paper through my Big Shot using a Cuttlebug embossing folder. I completed the look using the Tim Holtz Industrial Technique that I learned in his Creative Chemistry 102 online class.

I love how it all turned out and I doubt I will ever buy metallic paper again. However, my stash of cut out cardboard boxes has increased significantly.


Thank you for visiting and hope you will stop by again.

Till next time, happy paper crafting.


Supplies used from my inventory:
  • Tim Holtz - black soot distress paint
  • Cuttlebug embossing folder
  • Kelly's outline stickers
  • Recollection cardstock
  • Sookwang Creative tape
  • Peel-off's magic tape
  • Glitter Ritz - cool highlight
  • Copics - 0, 100, R89, B91, C5, E77, W5
  • Stampin'up ink - sahara sand
  • Tim Holtz Stampers Anonymous - Road Trip CMS128
  • Big Shot
  • Scotch Advance tape glider

Supplies purchased:
  • None


Saturday, April 5, 2014

It is someone's birthday

Simon Says Stamp is celebrating their 5th year of challenges. Happy Birthday!!

For the occasion and to submit into their contest I created the following card.

Sorry for the blurry picture. It appears that I need to develop my photography skills along with my crafting ones.


I thought the stamp image from Stampin'up "Not So Serious" stamp collection was perfect for a birthday card for Simon Says Stamp since their mascot/logo is a dog.

Until next time, happy crafting and enjoy the spring like weather.

Supplies used from my inventory:
  • Recollections - Cardstock
  • Recollections - Regent Street paper pad
  • Lil' Inker Designs - Pieced Chevron die
  • Spellbinder - Classic Scalloped Circles large
  • Memento ink - Tuxedo black
  • Stampin'up - Not So Seriously
  • Big Shot
  • Stampin'up - 2-way glue
  • Copic Markers - YG03, YG63, E11, E23, E37, W1, W5, W7, E01, RV69, B39, B0000
  • Tim Holtz distress ink - Walnut Stain
  • Tim Holtz Tonic Studio - scissors
  • Tombow glue
  • Zapdots foam adhesives


Supplies purchased:
  • None


Thursday, March 27, 2014

Chillin with my Peeps

Hello everyone,

Fantabulous Cricut challenged us to use birds in our paper project this week. I think I met the requirements of this challenge and then some.

I started by making my own background paper. I used a technique called "Blended Distress & Flick Technique" that I learned in Tim Holtz Creative Chemistry 101 online class. Then I randomly stamped various images, including an image of a bird, to complete my patterned paper.

A product I have been wanting to try is molding paste. I knew that I wanted a dark branch over top of my patterned paper but I didn't have a branch sticker, a branch stamp, nor a branch die cutting plate. However, I did have a tree stencil and some molding paste. Here was my opportunity to try this very popular technique. I taped off the areas of the tree that I did not want and applied the molding paste. After the paste was completely dried I coloured it using the E77 Copic marker.

A few months ago, I bought the "Straight from the Nest" Cricut cartridge without much of a chance to use it. The FCCB challenge #203 was the perfect time to take this cartridge out for a test run. "Chillin with my Peeps" inspired the entire card. The image and the saying reminds me of a few of my friends.

I searched for the perfect combination of paper for this image without much success. I had the red and the black but nothing that was quite right for the bird. I have the philosophy that if you can't find what you are looking for, then make it yourself. I cut the image out of white cardstock and coloured the little bird using Y13 and Y35 Copic markers.


I hope this card puts a smile on your face as it does mine.

Have a great day and don't forget to chill with your peeps!


Items used from my inventory:
  • White cardstock - Recollections
  • Coloured cardstock from my scrap pile
  • Patterned cardstock from unknown source
  • Distress inks (I don't know what I would do without my distress inks)
    • Iced Spruce
    • Shabby Shutters
    • Forest Moss
    • Weathered Wood
    • Victorian Velvet
    • Pumice Stone
  • Inkadinkado - Flourishes stamp
  • Straight from the Nest Cricut Cartridge
  • Golden gel mediums - Light molding paste
  • The Cafters Workshop.com - Branches Reversed stencil
  • Stampin'up 2-way glue
  • Copic Markers - Y13, Y35, E11, E37, E77
  • Scotch Advanced Tape Runner
  • Zapdots foam adhesives


Items purchased:
  • Nothing


Friday, March 7, 2014

Paper Organization

Hello,
PJ Challenge asked us to share one of the ways we organize our crafting supplies. Unfortunately, I am too late to link this post to the PJ Challenge blog but I want to share my organization secrets just the same. I am going to share how I organize my papers.
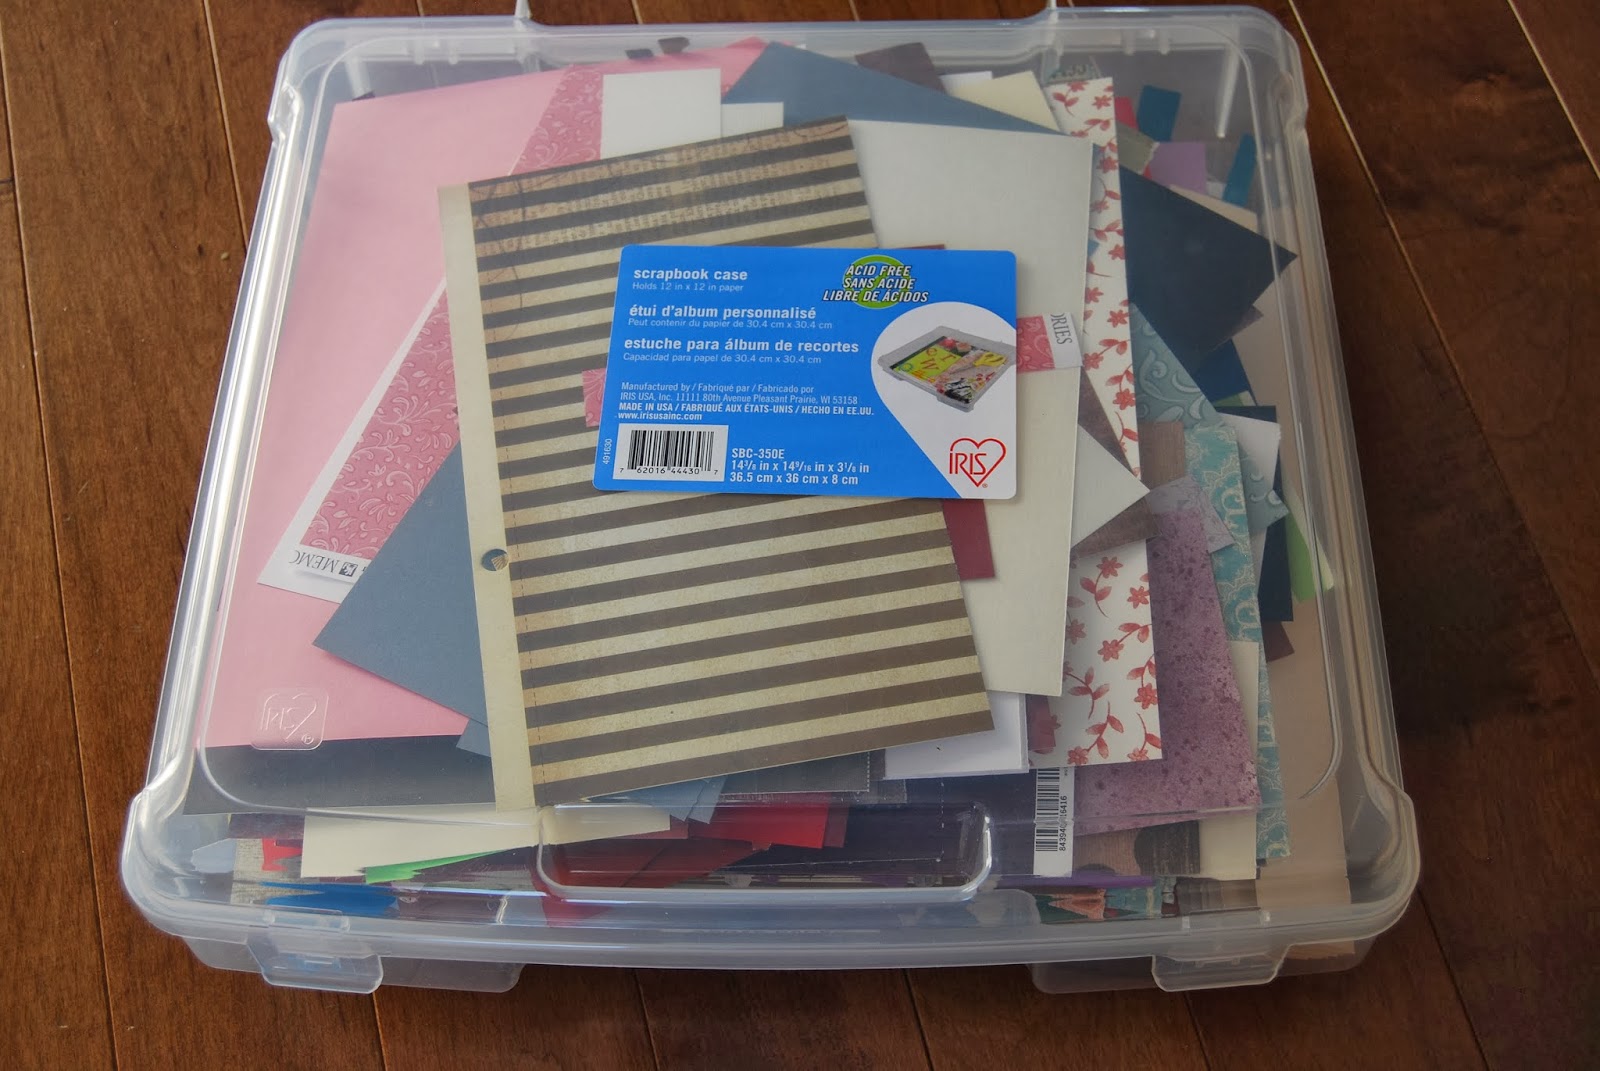
Before I organized my collection of over 800 pieces of paper, I would get quite frustrated when I sat down to create a scrapbook page because it would take me a very long time to find the right papers for the layout. To help with my paper selection I have divided my full sheets of paper into 6 categories; solid colour cardstock 8x11, solid colour cardstock 12x12, one sided patterned paper 12x12, two sided patterned paper 12x12, children themed paper and Christmas/Winter Holidays themed paper. I use Cropper Hopper 12 x 12 and 8x11 paper holders, Scroll Texture Box by Office Harbour and various art boxes purchased at Wallacks or Michaels.
In one container are the solid colour 12x12 sheets of cardstock. In a smaller container are the solid colour 8x11 sheets of cardstock.
 
I have all my patterned paper seperated into two categories. In one container are one sided pattern paper organized by colour and in the other are the two sided pattern paper also organized by colour. This has made my life so much easier. In the two sided paper container, I shuffle through each sheet one way, then flip the container around and shuffle through the other side of the papers. Time is saved by removing the one sided papers from the two sided papers.


One of the other things I do is organize my scrap papers. Any paper that is 12 inches long and larger than 6 inches wide goes into a Scroll Texture Box with a chipboard label hanging from the handle (the label maker tape would not stick). Any cut paper that is 12 inches long by 6 inches or less goes into another similar container.


Through my years of crafting I have come to realize that I can't look past the shape that was previously cut out of the scrap paper to see that I can use the left over in my new paper project. Therefore, when I am finished a project I trim any remaining pieces to a square or a rectangle removing any evidence of a shape or curve.These pieces are placed in a scrap container. 


Specialty papers such as velum, cork paper, sequence paper and so on are place in a seperate container.
These organization methods have saved me plenty of searching time, as well as, cleanup time.
I hope that it may help you as well.
Till next time. Happy paper crafting.

Saturday, January 4, 2014

Holiday Projects

As for many, the Christmas season usually brings a considerable size to-do list. You would think that after many years of stressing about all that needs to get done weeks before Christmas, I would learn to be more organized or make a smaller list... "yeah, no!"

Maybe 2014 will be my year for organization and smaller to-do lists.

One could always hope.

I am unable to include all the projects that I completed in December but here are a few. I will post the others after the recipients have received them. 

First up:

 
An apron I made for my mother-in-law. I used McCall's fashion accessories pattern 2947 and fabric I purchased at Fabricland.
 
Along the same idea is an apron I made for my son who loves to help me in the kitchen. My nephew was kind enough to fashion the apron for us. It's too bad that I needed to blur out his face, he is such a cute little boy.
 
The face was blurred to protect the identity and privacy of my family.

For this apron I used McCall's fashion accessories pattern M6476 and fabric purchased at Fabricland, as well as, Giroux Sewing Centre in Cornwall.
 
A gift card is a nice gift but it is extra special when it is presented in a homemade gift card holder. I was inspired by Marie's Present Gift Card Holders.  To make these cards I used paper from the Recollections Joyful Christmas paper pad, Stampin'up Merry Christmas stamp, Xmas Red Stickles,  Lil'Inker Bow die, Recollection brads, DMC floss, Forest Moss, Vintage Photo and Gathered Twigs Distress Ink, Creative Memories circle punch, Tombow glue, and Zapdots foam dots.


Other creative items made:
  • a digital photo album for my grandmother of her and her three great-grandchildren
  • a birthday card for my mother, and my father-in-law
  • a ton of baking with my 23 month old. We baked every Saturday morning in December to get away from TV watching.

As the days faded away, I had to prioritize my projects and unfortunately some were removed from the list. Projects that were carried forward to 2014 are personalized Christmas stockings for my son and my niece and reusable gift bags (I want to use up my fabric pile). There are a couple of other projects that I had to delay but I cannot mention them here because they will be gifts in the near future and I don't want to ruin the surprise.

In a couple of weeks, I will post the other three projects that I did during the holidays.

Till then, happy crafting.


Total Visits